![]()
![]()
![]()
![]()
![]()
![]()
![]()
![]()
![]()
|
|
|
|
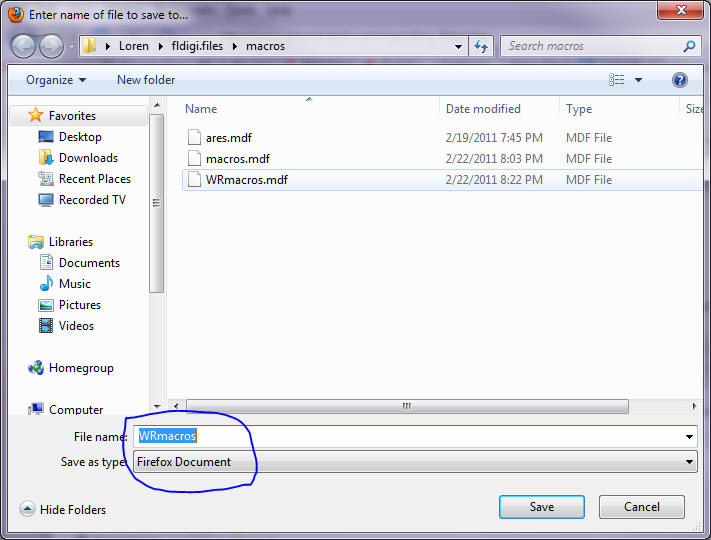
W. Rock MACRO FILE Next task is to download the macro W. Rockingham uses. Macros are shortcuts for performing repetitive tasks. I believe this macro is a little easier to use than the one that comes with FLdigi. You can try the following directions or for those less computer savvy go back to FLdigi Files for more detailed instructions. This procedure has been the source of great confusion so feel free to ask for help at mailto:w1uv@arrl.net. First download the W. Rock ARES Macro File by RIGHT clicking here and click the "Save Link As" (file name is WRares.mdf) if you are using Firefox or as "Save Target As" if you are using Windows Internet Explorer. This will open a window that should look like this:
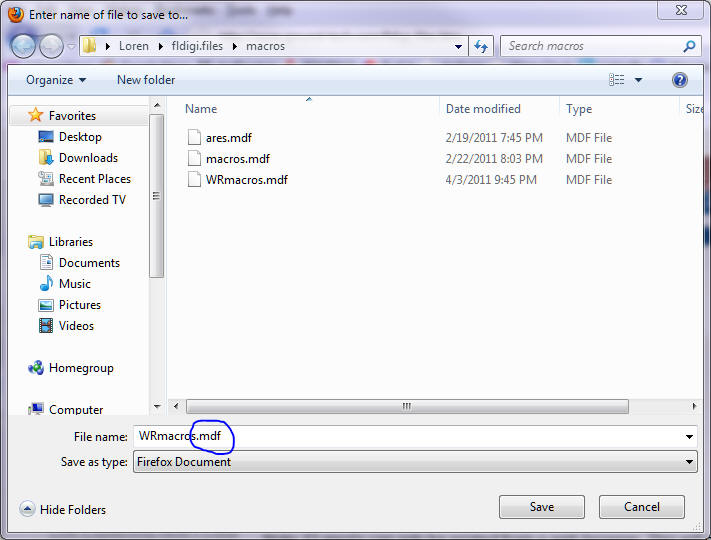
The file name, WRmacros, will show in the File Name: field without the file extension and the Save as type: field will show Firefox Document if you use Firefox or as some other type. It has been learned that you need to add the mdf file extension. So, change the file name so that it reads WRmacros.mdf and then save the file.
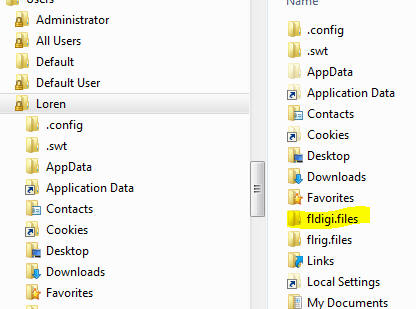
Next, navigate to the \fldigi\macros\ folder in your user account. For Windows 7 you have to first click on your C: drive, highlighted below.
Next double click the Users directory highlighted below. You will see in this directory all the users on your computer. Double click on the user name you use.
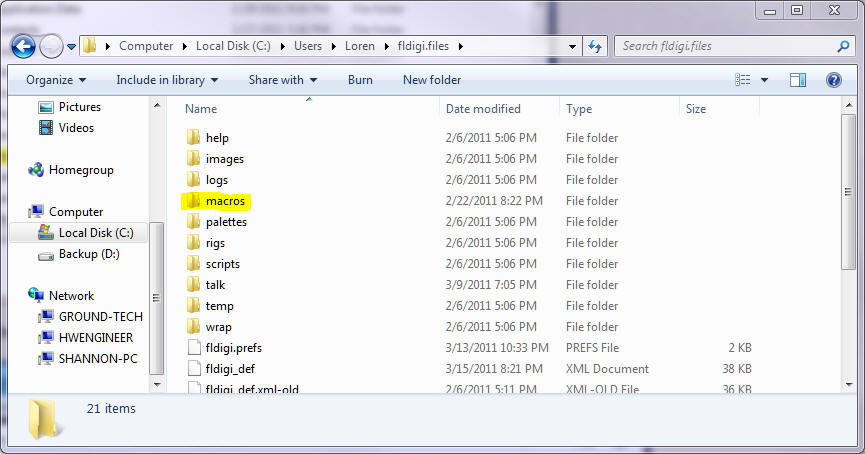
Next, double click on the fldigi.files folder.
Next, double click on the macros folder.
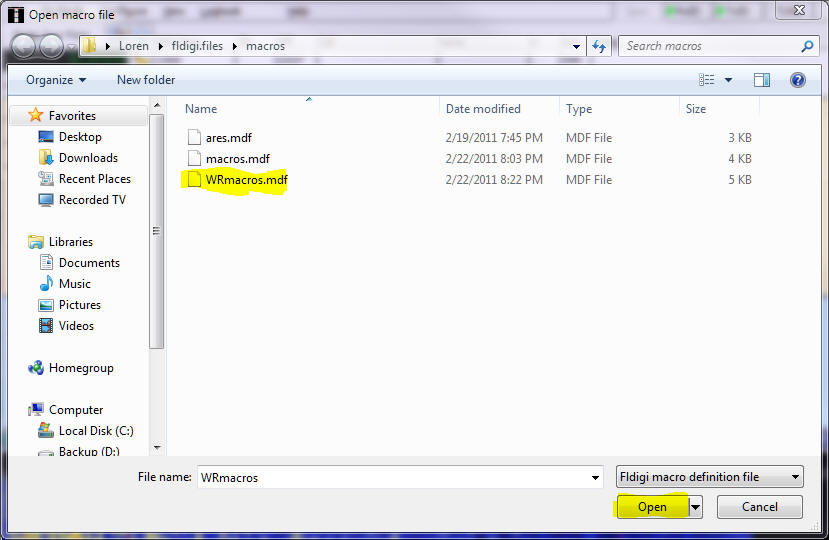
Click MRmacros.mdf and then click Open.
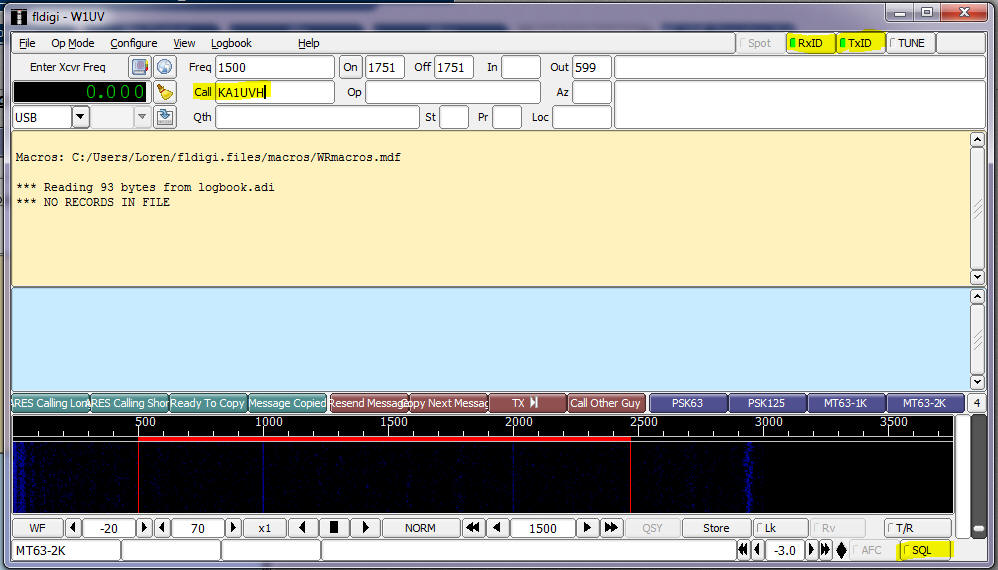
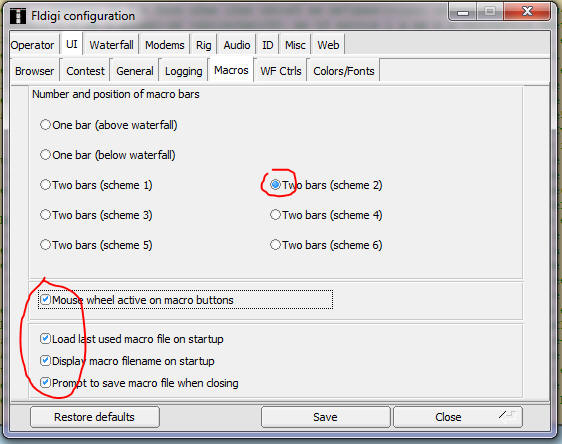
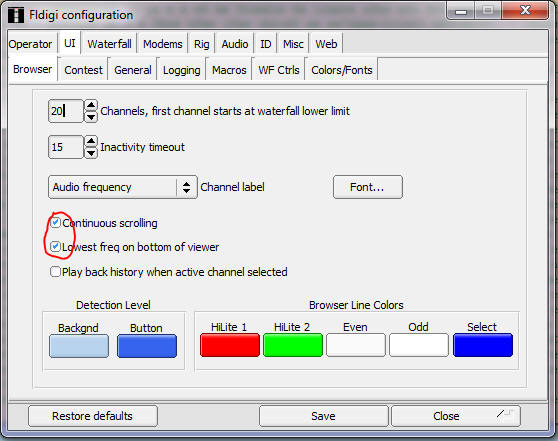
The new macro file will be copied to FLdigi. Finally, open the File button in the upper left again and move down to Macros. Click and press Save. Now this macro will be used every time you open FLdigi. There are four sets of Macros in this file. Number 3 is used by the NH ARES HF net. Number 4 has been tailored for W. Rock ARES. To get to Number 4 click on box in the circled area until you get to 4. Note - Every time you open FLdigi Macro Number 1 will appear. You will need to click the box three times to get to Macro Number 4.
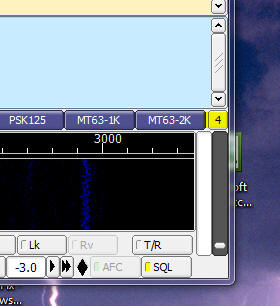
Click the MT63-2K button. This will put FLdigi into MT63-2K mode. From this point you will learn how to use FLdigi during an ARES training session. Back to top Home HF-VHF Operating Notes 10/19/2013 |