
![]()
![]()
![]()
![]()
![]()
|
|
|
|
This page will guide your through setting up FLmsg and using it. This, of course, assumes you have downloaded and installed the program.
Sending a MessageThe type of form used to send a message is chosen by clicking on the Form button shown in Item 2 above. You will then be offered a number of types of forms. The ones with ►next them will have a number of forms that fall into that particular category. Unless otherwise notified we will be using the ICS213 form. Click on ICS and then ICS213. The following form will appear: Filling out the form is pretty much self explanatory. A note on two items:
In the Message box you can either type the message or you can Cut it from another document and Paste it into the box. Note - You can only Cut and Paste text, not images. If you are responding to a message click the Responder tab. When you are done and ready to send click the AutoSend button at the top. Receiving a MessageTo receive a message both FLdigi and FLmsg need to be running. The first thing you need to make sure is that you are using the same protocol and frequency offset as the other station. If you followed the instructions for setting up FLdigi you should be all set. After the other station starts sending a FLmsg you should start seeing a green bar in the lower right corner of the FLdigi window. If the message is successfully received FLmsg will automatically open a window in your default Internet browser. Note - So far Internet Explorer and Firefox are the only two browsers I'm sure work. From the browser you can print the message IMPORTANT - If you are acoustically coupling your computer and rig it is important to 1) Know beforehand what your volume setting needs to be on your PC, 2) Know where to place your rig's microphone and speaker in relation to your computer. This will likely need some trial and error. 3) Try and eliminate or prevent any external noise. These steps should be done during a training session and not attempted during an activation. Trying to configure your PC during an activation can waste valuable time and diminish your ability to help. Recovering MessagesBoth transmitted and received messages are stored in directories on your computer. To recover a received message, in FLdigi, click the File button at the top and then click Open. This will open the directory where the html version is stored. Double click on the message you want to view. To recover a message you sent, in FLmsg, click the File button at the top and then click Open. This will open the directory where the FLmsg version of the file is stored. Double click on the message you want to view it. If you want to print this message click the File button and then the View button and click the Html file copy button. This will open a browser window with the message. 09/23/2012
|
 on your desktop. Note -
The version shown after flmsg may be different.
on your desktop. Note -
The version shown after flmsg may be different.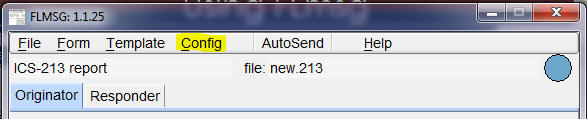 Click the first item, Personal Data and fill out the form and close
it.
Click the first item, Personal Data and fill out the form and close
it. Close
this form.
Close
this form.
 symbol next to each field.